I realised that most of my hobbyist electronics projects included a character LCD in them. I was looking for a better way to reuse LCD without wiring one in every ESP microcontroller project. Hence came the idea of network connected LCD controller API which would display the data sent to it on LCD. Lets take a look at how you can build your own.
Getting Started
Before I get into the details of how you can send a HTTP request to LCD Controller over the internet or local network and get it to display data on LCD, head over to the
github page of project to find the hardware requirements and how to setup your local environment.
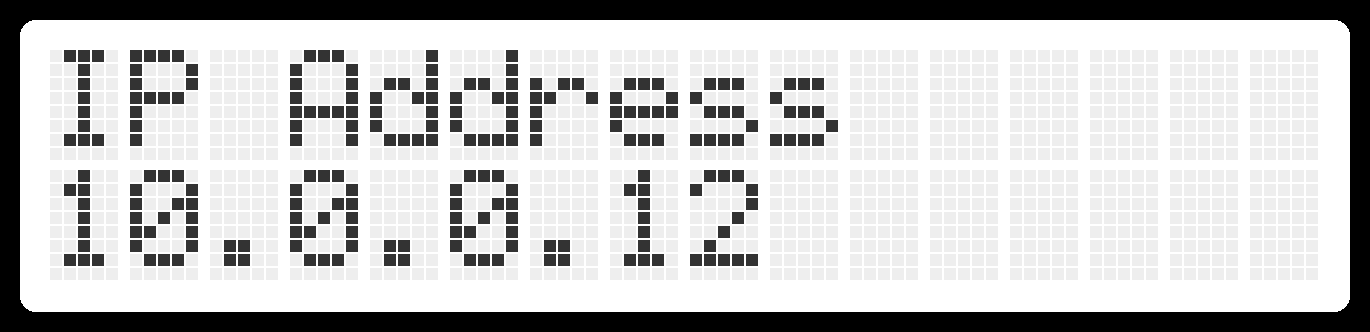
Once you have the development environment up and running, and the ESP programmed, the LCD should look something like this.
Sending Request
We are going to use a tool called Postman to send HTTP requests to our LCD
but in theory you can use any program that allows you to send HTTP requests or
you can write one in your preferred programming language to intergrate the LCD in your project.

Clear Display
Send a POST request to http://{IP address of your LCD}/clear endpoint with blank body to clear all text from all rows and columns of your LCD.
Displaying Data
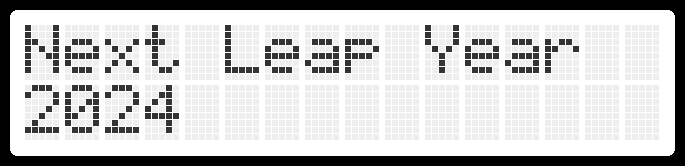
Data can be displayed by sending a POST request to http://{IP address of your LCD}/display endpoint. Select raw as body type in postman
and send this JSON payload.
        {
            "data": [
                {"text": "Next Leap Year"},
                {"text": "2024"}
            ]
        }
data array represents a row on LCD. Number of rows and columns can be defined in src/main.cpp file.
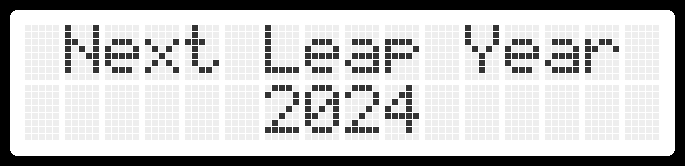
Text Alignment
The request in previous section can be modified to align text on LCD. Possible values are as follows:
| Value | Alignment |
|---|---|
| 0 | Left (Default) |
| 1 | Center |
| 2 | Right |
The code below will center text in both rows.
        {
            "data": [
                {"text": "Next Leap Year", "align":1},
                {"text": "2024", "align":1}
            ]
        }
Scrolling
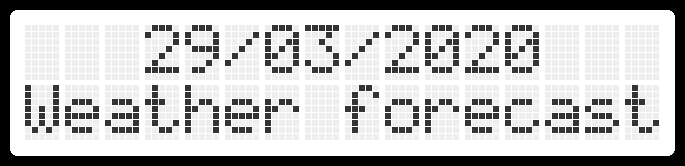
Scrolling can be turned on by sending "scroll":1 in JSON payload to display endpoint.
        {
            "data": [
                {"text": "29/03/2020", "align":1},
                {"text": "Weather forecast: There is a slight chance of evening showers today."}
            ],
            "scroll":1
        }
Thank You!
Thank you for reading. Feel free to contribute your ideas.